Italian Macarons
Difficulty level: Hard
Jump to recipe

My first ever experience of eating macarons was about five years ago when I was still at uni. I was in Harrods admiring all the things I couldn’t afford when I came across a patisserie stall selling macarons. Out of curiosity I bought a few, took my first bite and fell in love instantly. Since then had been on a quest to make them myself.

Why something so dainty would cause so much frustration I will never know. No wonder they cost so much! It’s taken me around 10-12 attempts to get it right but with patience, practice and persistence I got there. This challenge was definitely a test of character.

I know I typically share simpler recipes, but in a previous poll I did on my Instagram stories the majority expressed they are adventurous and are open to trying more challenging recipes. I then set myself a challenge to consistently make macarons at home for you to challenge yourself.

I have also written a blog – The Truth About Making Macarons. There are certain things recipe developers and bloggers won’t tell you when it comes to making macarons at home, and I recommend you read this before attempting to make them.

Fun Fact: Although we typically associate macarons with France, the actual country of is Italy. The first macarons were just cookies made of sugar, almond flour and egg whites. The word macaron is derived from the Italian word, maccherone, meaning fine dough. It’s believed the macaron was introduced to France by an Italian chef in the 1500’s. It wasn’t until the late 1800’s that the French adapted the recipe and popularised it to what it is today – two macaron cookies with a filling inbetween.

Ney's Tip

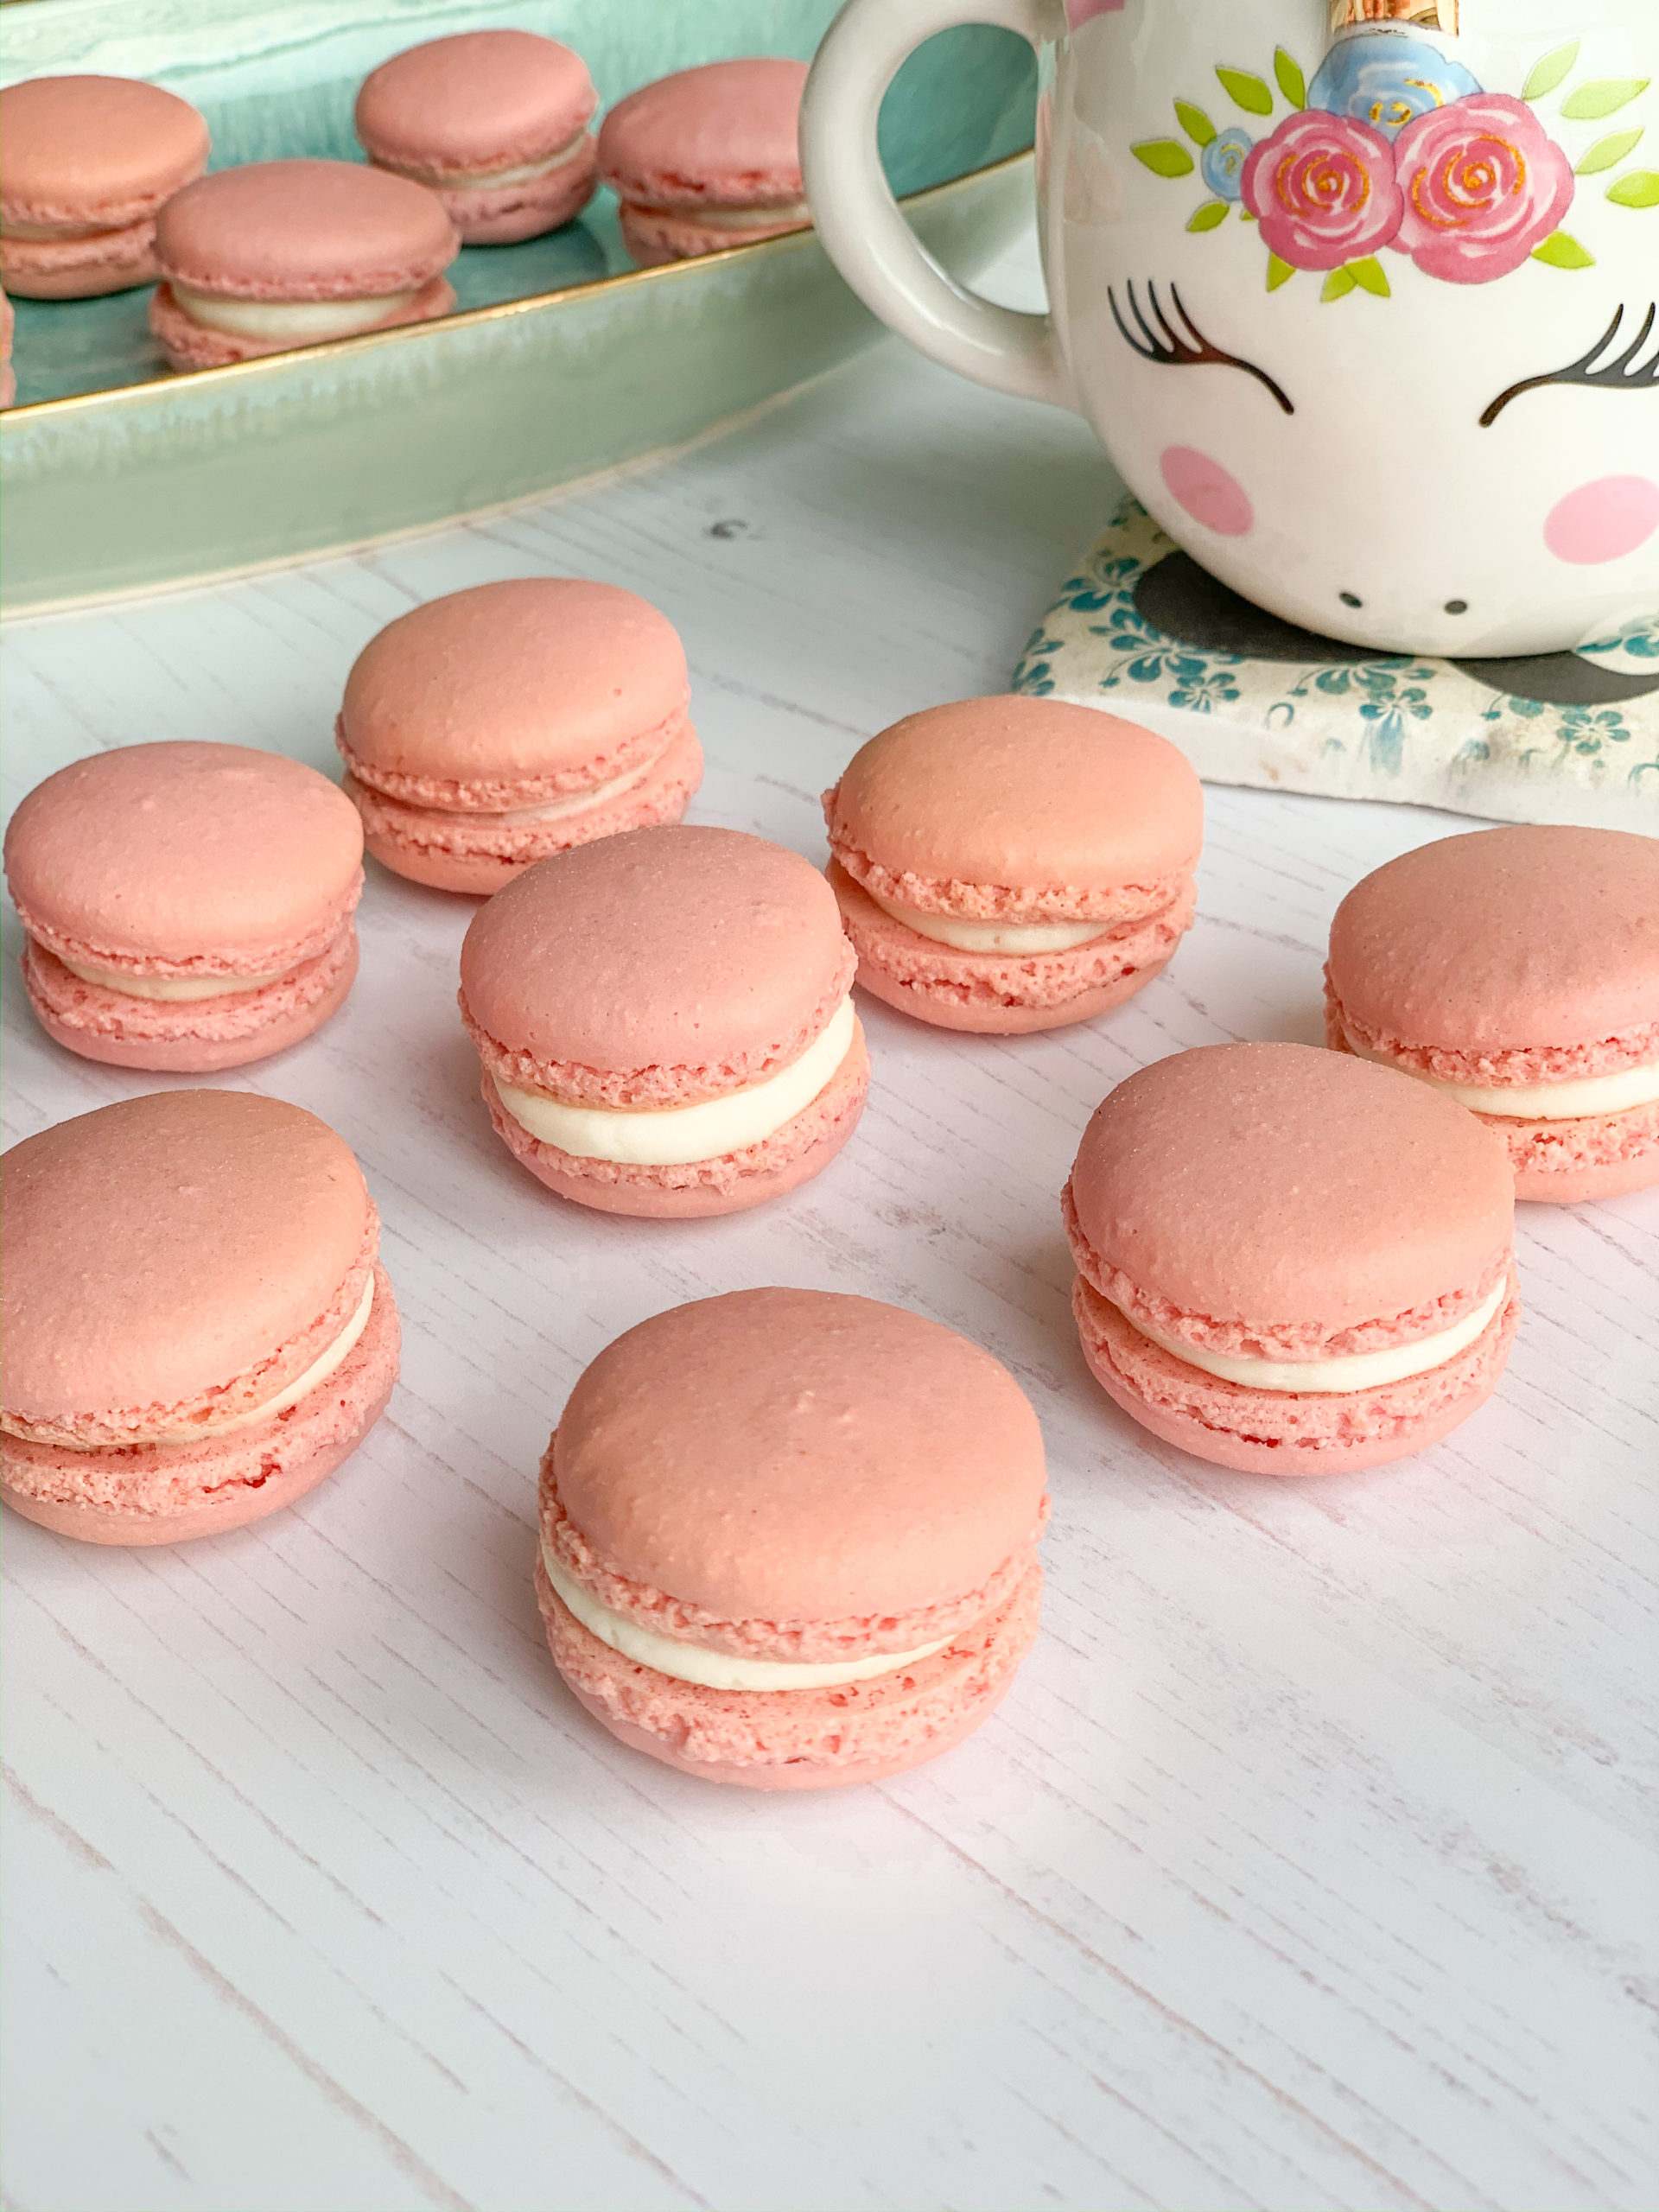
You can have any filling you want from chocolate ganache to a lemon curd buttercream.

Servings
20
Prep Time
15-20 minutes
Cooking/Baking Time
16 minutes
Ingredients

For the macarons

150g almond flour

150g icing sugar, sifted

110 egg whites (divided into 55g), room temperature

Pinch salt

½ tsp. gel food colouring (optional)

35g water (yes grams)

150g granulated sugar

For the vanilla buttercream filling

2 oz. unsalted butter softened,

8 oz. icing sugar, sifted

1 tsp. vanilla extract

1-2 tbsp. milk


Method
  1. Lightly grease two large baking sheets then line with greaseproof baking paper ensuring not to get any grease on the top. Prepare a large piping bag fitted with a #12 Wilton tip.
  2. Use a fine mesh sieve to sift the almond flour. If there are any bits that won’t go through, discard them.
  3. Next, sift the almond flour and icing sugar together into a large mixing bowl. Cover and set aside.
  4. In a small sauce pan, add the sugar pour over the water. Do not stir but gently shake the pan so that the water covers the sugar. Attach the sugar thermometer and place the pan over a medium heat to gently dissolve the sugar. The sugar needs to reach a temperature of 118º Celsius which can take anywhere between 9-18 minutes depending on your equipment. Keep an eye on it and use a clean pastry brush to brush the sides of the pan with a little water if necessary – this will stop the sugar from crystallising.
  5. In the meantime, roughly combine half of the egg whites with the food colouring, add to the almond sugar mixture, then thoroughly combine until you have a thick paste – don’t worry if it’s very stiff. Cover with clingfilm and set aside.
  6. Next place half the egg whites and salt into a large heatproof bowl and use an electric whisk on a high speed to beat the eggs just until they become frothy. Alternatively, use a stand mixer with a whisk attachment. Once the sugar syrup has reached 118º Celsius, immediately remove from the heat and carefully pour down the side of the bowl a little at a time whilst whisking on a medium-high speed. (Remember, the sugar is hot and can burn you). Once you’ve poured all the sugar syrup continue to whisk for 7 minutes or until the mixture becomes glossy and forms stiff peaks.
  7. To do the macronage, mix half the meringue mixture into the almond sugar paste with a wooden spoon. It will be stiff to begin with but keep mixing and folding until you start to get a thick smooth batter.
  8. Add the remaining meringue mixture, switch to a rubber spatula and continue to fold until thoroughly combined. The consistency should resemble a thick cake batter or it should form ribbons when the mixture falls from the spatula. Another way of checking is if you lift the batter with the spatula to form a figure 8 on top of the batter below it should hold its shape for at least 5 seconds.
  9. Add the mix into the piping bag, ensure to twist the top to seal it. Pipe the macarons straight down on to the baking trays by applying pressure to the piping bag to create a 1½-inch (3-cm) circle then releasing with a quick flick. There’s no need for circular motions. Continue this method spacing the macarons at least 1-inch (2-cm) apart.
  10. Tap the sheets on a flat surface a few times to help remove any air bubbles. Use a toothpick to pop any small air bubbles that appear on the surface of the macarons, then leave to set in a dry place for 30-45 minutes. It should start to form a film on the outside and shouldn’t feel sticky when touched.
  11. In the meantime, make the buttercream feeling by combining all the ingredients together until smooth and creamy, adding a little milk at a time. Cover and set aside.
  12. With 15 minutes left, preheat the oven to 160º Celsius.
  13. Bake the macarons on the upper shelves on the oven for 16 minutes. Remove from the oven and leave to cool for 10 minutes. Carefully slide the baking paper from off the baking sheets onto wire racks and leave the macarons to cool completely.
  14. Transfer the buttercream to a piping bag fitted with a round tip. Add a dollop of buttercream to one macaron shell. Top it with another macaron shell to create a sandwich. Repeat with remaining macaron shells. Place in an airtight container overnight to ‘bloom’ which basically means to develop a better flavour (this is optional).
  15. Enjoy!

Your Photos

I'd love to see how you've made it! Tag me on Instagram @neyskitchen.official  with #neyskitchenofficial or contact me to submit your photos.

Sign Up
Get exclusive info from recipes to photography tips

    magnifiercrosschevron-down