One thing I have certainly noticed is that recipe developers and bloggers aren’t entirely transparent in their methods for making macarons, especially when their headlines read ‘get macarons right the first time’ or ‘fail-proof macaron recipe.’
I’d advise you to not take them at face value to avoid disappointment and waste of ingredients. What they don’t tell you is that there are too many variables that affect the final result. For example, the temperature of your kitchen and the quality of ingredients. Therefore, research and practice are key when making these delicate cookies.
I am by no means an expert in making macarons; I am simply sharing my personal experiences and tips that I wish I had learned before failing at macarons nearly 10 times (whoops).
I aim to guide how you go about making macarons especially if it’s your first time. I have also provided my personal tips to ensure you get closer to making the perfect batch.
1. French vs Italian method. There are two main methods for making macarons – the French method and the Italian method. The main difference between the two is the way the meringue is made. In the French method, egg whites are whisked until a stiff-peaked meringue forms before folding in to the ground almonds and icing sugar mix. The Italian method involves whisking the egg whites with a hot sugar syrup to form a meringue. I’ve had better results using the Italian method as the meringue has more structure to it thanks to the hot sugar syrup to form the perfect macaron.
2. Do not attempt to make macarons when you’re stressed, tired or hungry. Trust me, you’ll need as much concentration and energy as possible.
3. Ensure you have the right equipment and ingredients ready. If you’re making Italian macarons you will definitely need a sugar thermometer to accurately ensure the sugar syrup is at the perfect temperature. This will provide the structure needed to create the iconic macaron shape. Also ensure you have your ingredients measured out in advance. There are certain steps you cannot delay when making macarons. Therefore, having everything in reach and ready for you to use will cause less stress and will help you focus.
4. Make sure all your equipment is super clean. Macarons hate grease. It is imperative that your bowls, spatulas, baking sheets etc haven’t got any oily residue.
5. All ingredients will need to be at room temperature. The eggs especially will need to be at room temperature or else they will not whip up correctly to make the perfect meringue. For best results leave the eggs out the day before you plan to make macarons.
6. To age eggs or not to age? The process of aging the eggs is just basically putting the eggs whites in a bowl covered for a couple of days. Professional pastry chefs swear by this. It’s supposed to dehydrate the egg whites as much as possible, causing the egg whites to lose elasticity and create a stiffer meringue which in turn produces the right consistency for macarons. I don’t know what eggs they’re using but I personally think it’s a lot of faff and I haven’t seen a difference. Simply ensure the eggs are at room temperature.
7. Use gel food colouring, NOT liquid colouring. Macarons are sensitive to added liquid. I strongly suggest you use a concentrated gel colouring to avoid the need to use so much of it to get the desired colour.
8. Your kitchen should not be too hot or too cold. You need to make macarons in a consistent room temperature setting as this does affect the consistency of the macarons which will also dictate how well the macarons form a film/coating before baking.
9. Precisely weigh the ingredients. I would highly recommend digital scales when making macarons as they are more accurate. Making macarons is a delicate process. I found by just being 1 gram off or adding to a little bit of liquid can completely alter the final result. So frustrating! Always measure in grams rather than ounces or cups. I had way better results when I followed recipes that didn’t measure in ounces or cups.
10. Use almond flour not ground almonds. I have had no luck with the ground almonds that are available in most shops. They are not fine enough even when you put it through a food processor. If you have to force it through a fine mesh sieve, then they are too coarse and won’t yield good results. I bought fine almond flour on Amazon from a company called RealFoodSource.com. It costs around £10 but it’s the best for making macarons.
11. Always sieve the almond flour and icing sugar. This is to ensure there are no lumps in the batter. Always discard any lumps that don’t go through the sieve. You mustn’t skip this step.
12. Use the right sugar. White granulated sugar I’ve found works best, especially when making macarons the Italian method. Caster sugar is too fine and will skew the measurements. It also does not have the same sugar crystal structure as granulated. There’s a scientific explanation but caster sugar basically alters the texture of baked goods.
13. Adding flavour to the macarons. If you’re new to making macarons, I would avoid adding flavourings to the batter as usually it comes in a liquid form. Adding more liquid even a miniscule amount can alter the consistency especially when most flavourings are made with oils or alcohol. I would reserve it for the filling to sandwich the macarons.
14. Consistency is key. The macronage stage is often the most critical. It’s the point where you combine the meringue to the almond and icing sugar mixture. The consistency should resemble a thick cake batter or it should form ribbons when the mixture falls from the spatula. Another way of checking is if you lift the batter with the spatula to form a figure 8 on top of the batter below it should hold its shape for at least 5 seconds. Some people count how many times they fold in or mix the batter, but I’ve found it varies and it’s not very accurate. This is something that simply requires practice and you will start to get an eye for the right consistency.
15. Remove trapped air bubbles. The best way to ensure this is to get the macronage stage perfected as trapped air in the batter causes cracks. Once you pipe the macarons on the lined baking sheets tap them on the kitchen surface a couple of times. Additionally, use a toothpick to pop any air bubbles that appear on the surface of the macarons.
16. Silicone mat or greaseproof baking paper? In my opinion, greaseproof baking paper is better. I find the silicone mat makes the macarons hold on to moisture which is not ideal as they won’t form ‘feet’ (the iconic ridge around the macaron).
17. Macarons should take 15-45 minutes to set or form a film. Before you bake macarons, you need to let them sit for a while to form a coating. I’ve seen recipes where they completely skip this step and supposedly the perfect macarons are formed. Don’t believe this! You must let the macarons set before baking. When touched the batter shouldn’t stick to your finger. If it’s taking longer than 1 hour, it could mean there’s too much liquid in the batter, something went wrong in the macronage stage or the house/kitchen was not at an ambient room temperature. Humid temperatures can have this effect as the moisture in the air prevents the macarons from setting.
18. Oven temperature is super important. I am going to assume most of you have fan/convection ovens. Gas ovens don’t create a consistent oven temperature and therefore aren’t ideal when making macarons. However, fan ovens don’t necessarily maintain the same temperature you set it on. The longer you leave the oven running the hotter it gradually gets. I advise you preheat the oven to 150º Celsius 15 minutes before you intend to bake the macarons. Bake the macarons on the top two shelves.
19. Do not open the oven! I know it is so tempting to check, but unless you smell something burning do not open the oven, even just a little bit, to check or rotate the baking sheets as you will be releasing the necessary heat that will form the macarons. Just avoid the urge; you’re nearly there!
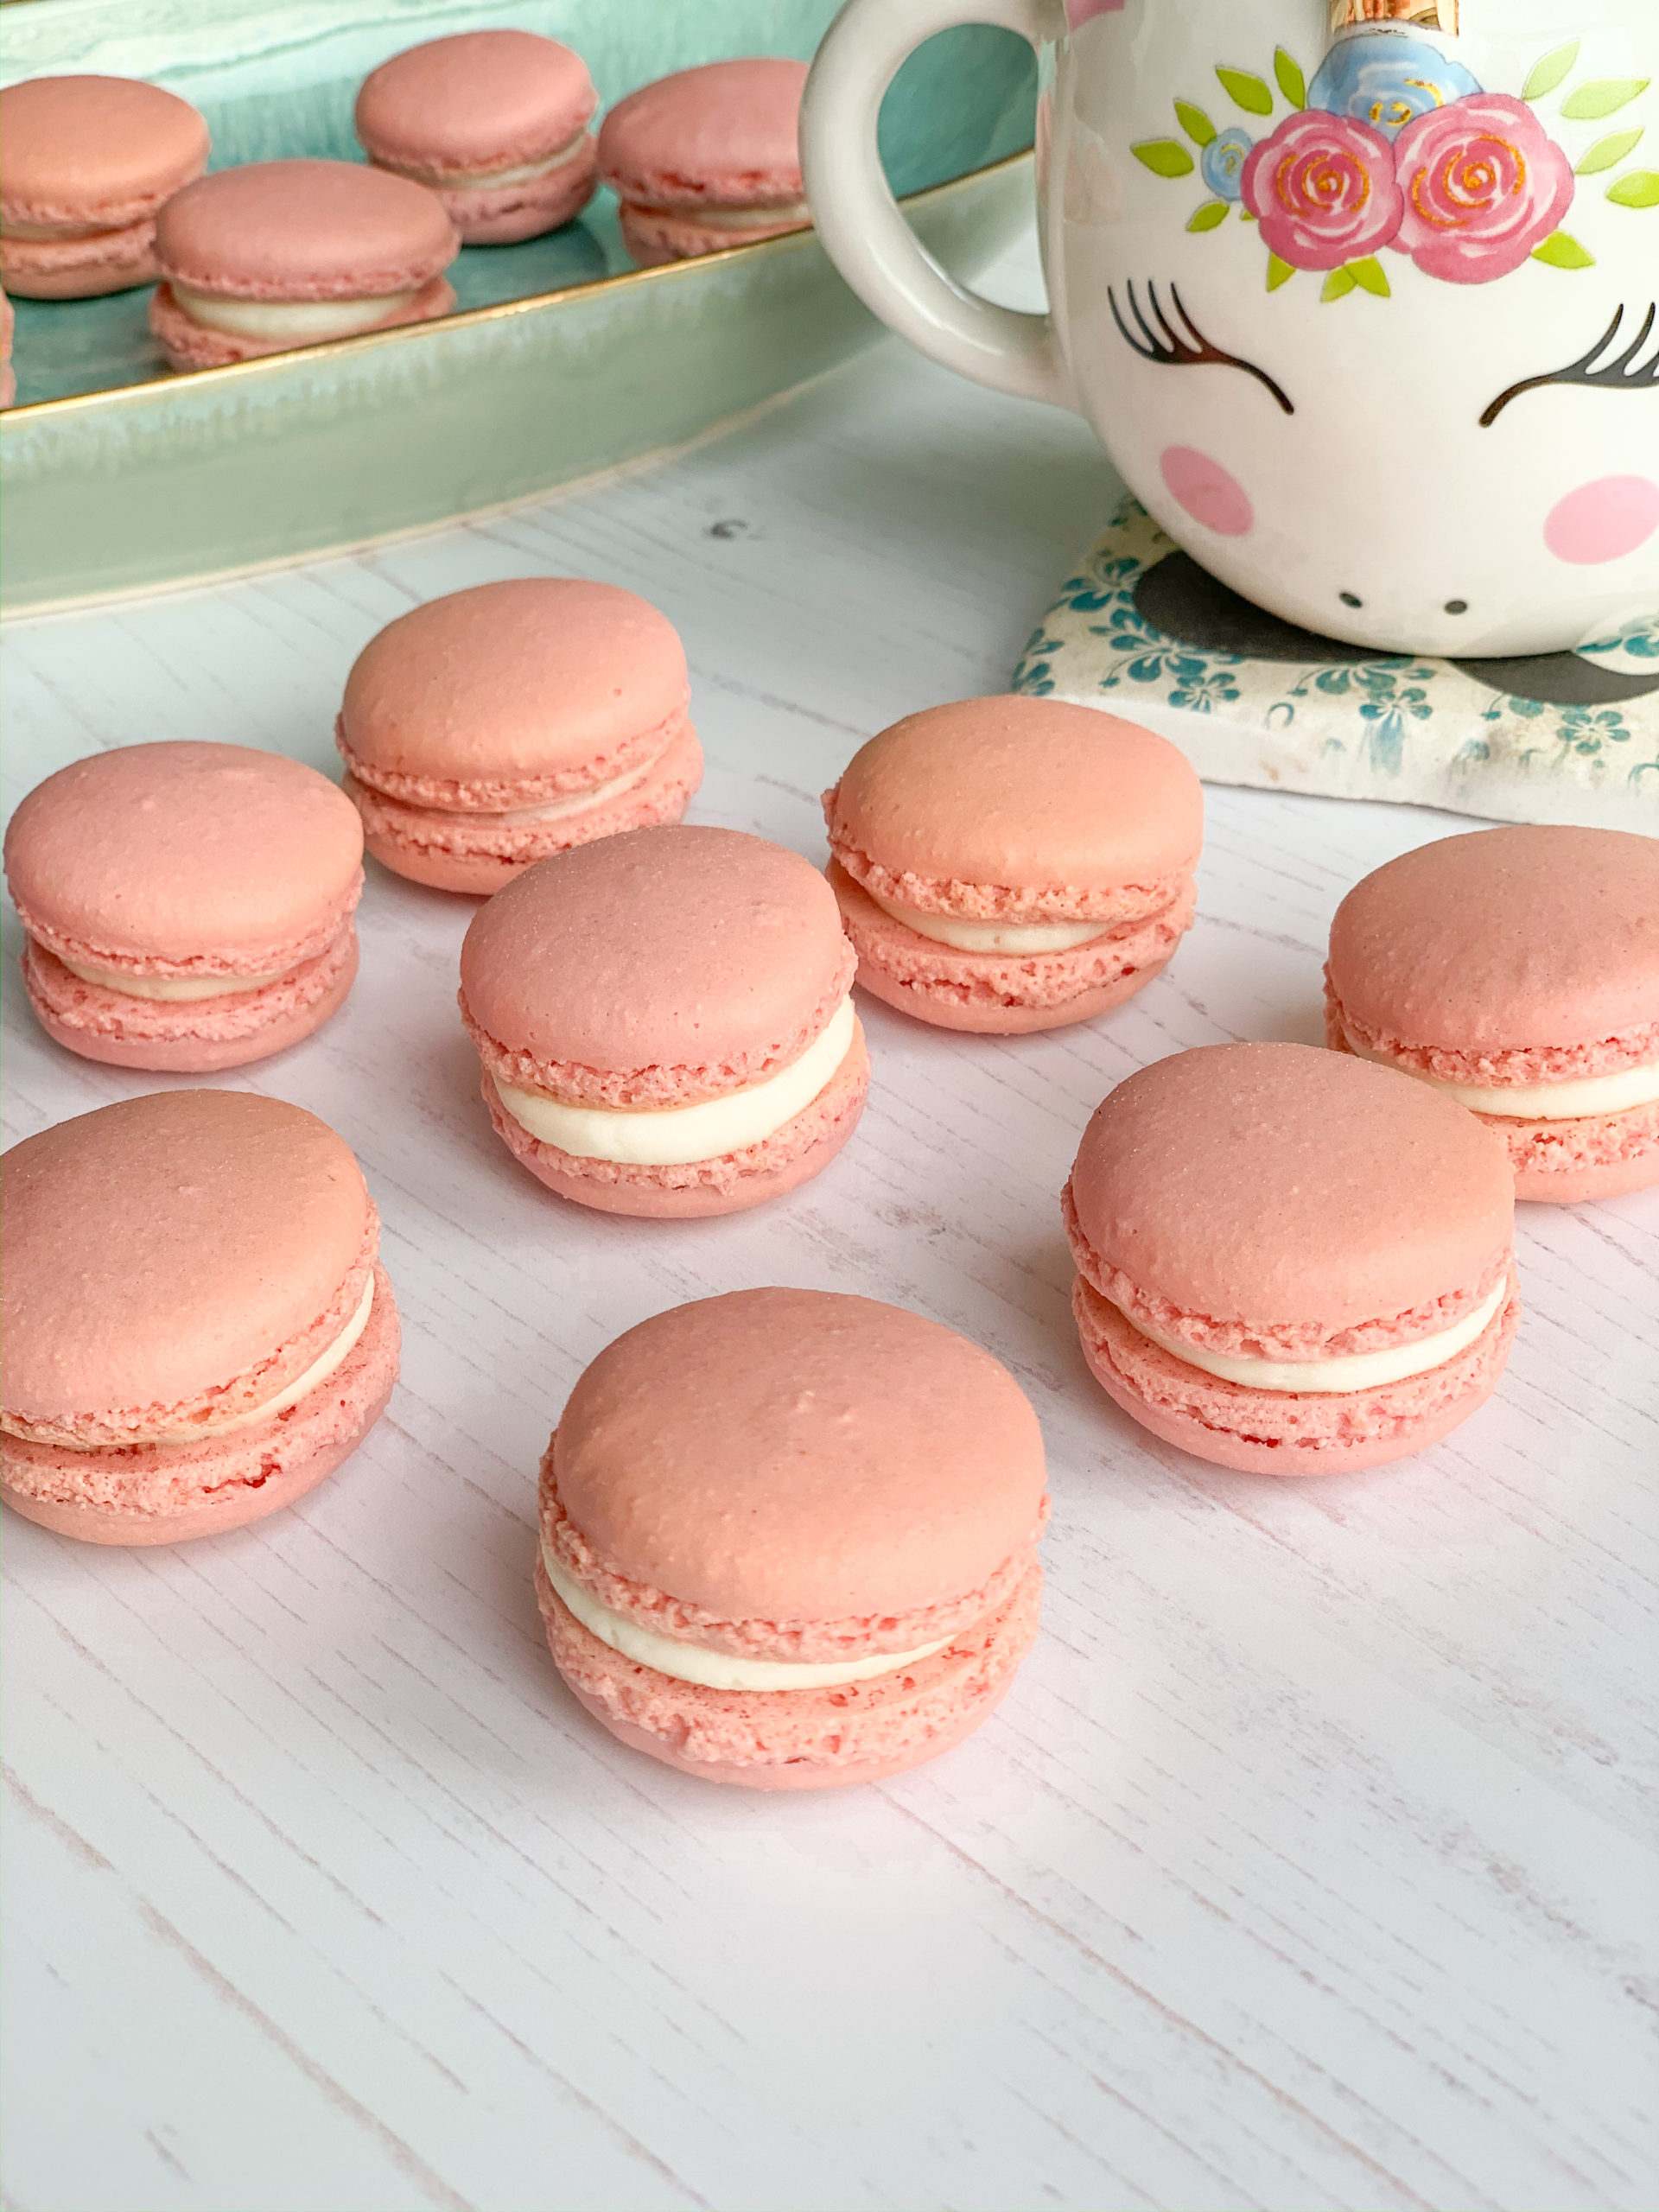
20. Let the macarons to ‘bloom’ or develop flavour overnight. It’s not strictly necessary. However, after you’ve sandwiched the macarons with a filling, leave them overnight in an airtight container. The macaron shells become soft and chewy and the flavour is enhanced, creating a more enjoyable experience when eating them.
I know it’s a lot to take in, but hopefully you are now in a better position to practice making macarons. Another tip I would add: if you’re macarons did not work out the first time following the recipe reflect back on what steps you took that could have potentially altered the final result. Make note and try again with the corrected actions you plan to take – don’t give up. If there are three key things you need in making macarons it is patience, practice and persistence. If you’re ready to make macarons yourself, click here for my recipe.